How to tap a hole by hand
Updated October 11, 2026
Tapping a hole by hand takes four tools: a drill, the tap, a tap wrench and some cutting fluid. Most broken taps and bad threads come from two mistakes, the wrong drill and a crooked start, and both happen before the tap has made a full turn. Here is the whole job in order, with a 1/4-20 hole worked through as the example.
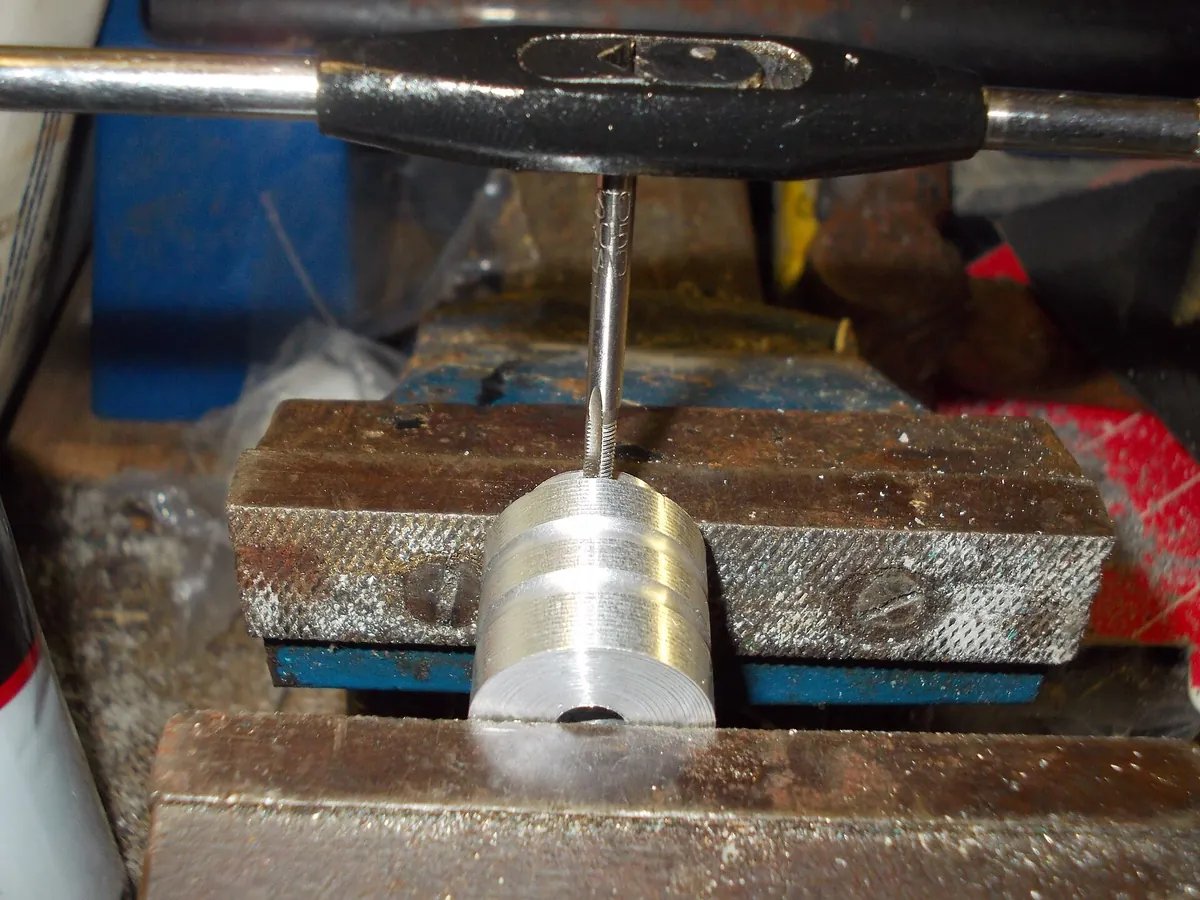

1. Pick the tap drill
The tap does not make the hole; it cuts a thread into the wall of a hole you drill first. That hole has to be close to the thread's minor diameter. Too small, and the tap has too much metal to cut and can jam or snap. Too big, and the thread is shallow and strips.
Every thread page on this site gives the tap drill, the % of thread it leaves and the nearest substitutes. All sizes are in the inch tap drill chart and the metric tap drill chart, and the thread calculator checks a drill you already have. Charts aim for about 75% thread: a deeper thread is only a little stronger but much harder to cut. Our standards and checks explain the formula.
The chart drill for 1/4-20 is a #7 (0.2010 in), which leaves about 75% of a full thread. A 13/64 in drill gives about 72% and is a common substitute. A thread-forming tap needs a bigger hole (about a #1 for 1/4-20, an estimate); never use that drill with a cutting tap.
2. Drill straight, and deep enough
Center punch the spot so the drill does not wander, then drill with the part clamped. A drill press is the easiest way to get a hole square to the surface; with a hand drill, sight it from two directions.
A through hole just goes through. A blind hole, one with a bottom, has to go deeper than the thread you need, for two reasons: the first threads of a tap are ground down (the chamfer) and do not cut full depth, and the chips need somewhere to go. Our thread pages use a rule of thumb: drill 5 pitches deeper than the thread for a plug tap, 2 pitches if you finish with a bottoming tap. Depth here means the full-diameter part of the hole; the drill point comes on top of that. For how long the thread itself has to be in each material, see the thread engagement chart.
3. Chamfer the entry
Run a countersink, or a drill bigger than the screw, lightly into the mouth of the hole until the chamfer is a little wider than the thread's major diameter. It gives the tap a centered start, keeps the first thread from raising a burr, and lets the screw start cleanly later.
4. Start the tap square
Use a tap wrench, not pliers. Put a few drops of cutting fluid on the tap, set it in the hole, and press straight down lightly while you turn clockwise (for a right-hand thread) until you feel it bite. After a turn or two, stop and check it against a square, then check again from 90 degrees around. If it leans, back it out and restart; it will not straighten itself once the thread is cut.
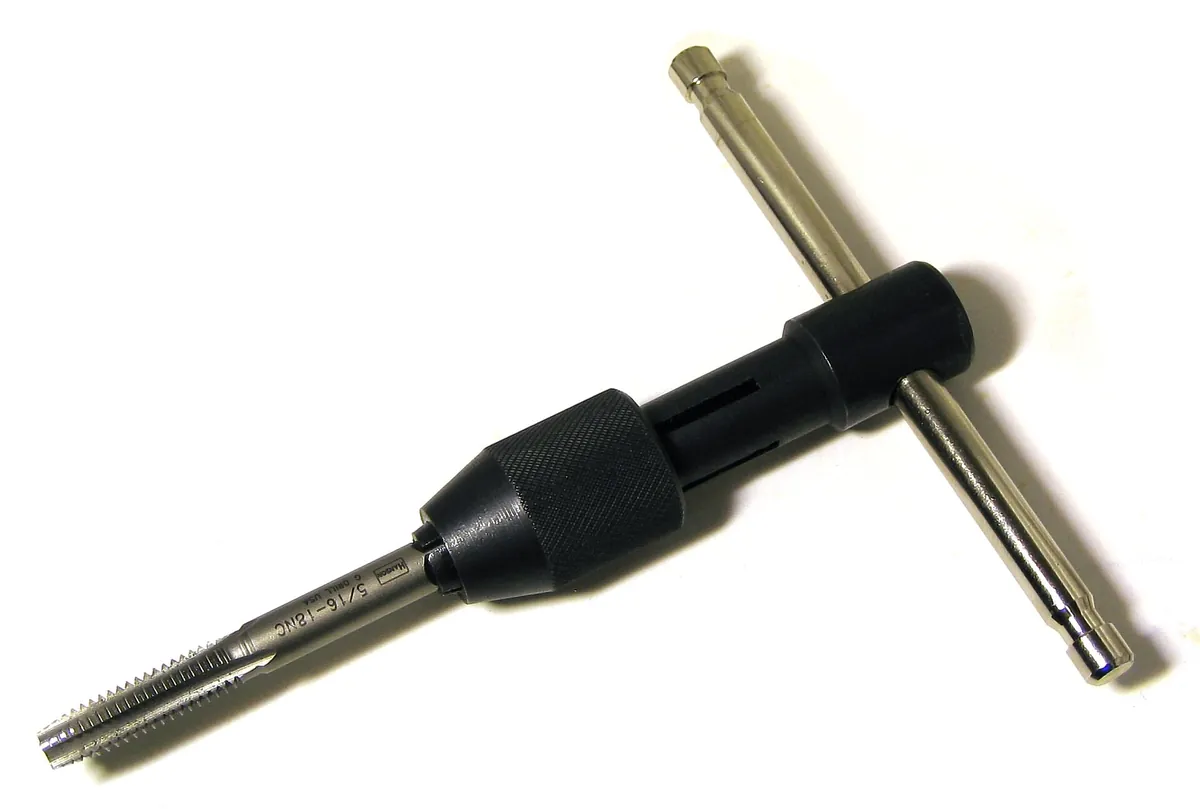

On a drill press you can hold the tap in the chuck with the machine off and turn the chuck by hand, or use a tap guide (a block or spring-loaded center that keeps the wrench aligned). That is the surest way to start square.
5. Turn, back off, repeat
A standard hand tap has straight flutes, and the chips it cuts stay in those flutes. Turn it forward a fraction of a turn, then back it off until you feel the chip break, and go on. The feel tells you more than any count: if the tap gets stiff, stop and back off further. In a blind hole, back the tap all the way out now and then to clear the chips, especially near the bottom. Forcing a tight tap is how it breaks, and a broken tap is hard to remove.
Cutting fluid helps most in steel and stainless; aluminum also tears less with it. Cast iron and brass are often tapped dry. Spiral point and spiral flute taps move the chips out of the way and need less backing off: see taper, plug and bottoming taps for those and for thread-forming taps.
6. Switch to a bottoming tap if you need to
A plug tap, the kind sold one at a time, is fine for through holes and for blind holes that are deeper than they need to be. If the thread has to reach close to the bottom, start with the plug (or taper) tap, clean out the chips, then finish with a bottoming tap. The bottoming tap's short chamfer is hard to start straight on its own, which is why it comes last.
7. Clean and check
Clear the chips: blow them out wearing eye protection, or flush them, and run the tap through once more. Then try the screw. It should thread in by hand. If it binds, look for chips, a burr at the entry, or a screw with a different thread (an M6 looks a lot like a 1/4-20). For parts that have to meet a thread class, a go/no-go plug gauge is the real check.
Worked example: a blind 1/4-20 hole
A 1/4-20 thread is 0.250 in across with 20 threads per inch, so one pitch is 0.050 in. The drill is the #7 (0.2010 in). How long the thread should be depends on what it is in: the thread page starts from 1 × the diameter in steel and more in softer metals. Five pitches is 0.250 in, two pitches 0.100 in. So in steel, 0.250 in of thread means drilling 0.500 in deep for a plug tap:
| Material | Thread length | Drill depth, plug tap | Drill depth, finished with a bottoming tap |
|---|---|---|---|
| Steel | 0.250 1 × D | 0.500 + 5 pitches | 0.350 + 2 pitches |
| Cast iron, brass | 0.375 1.5 × D | 0.625 + 5 pitches | 0.475 + 2 pitches |
| Aluminum (upper end) | 0.500 2 × D | 0.750 + 5 pitches | 0.600 + 2 pitches |
These depths are where to start, not a guarantee: the right thread length depends on the materials, the load and the screw. See the 1/4-20 page for the to-scale drawing of this hole, or the thread callouts guide for the one-line note that puts the same four numbers on a drawing.
Using a tap and die set
A tap and die set holds taps and dies for common sizes, a tap wrench and a die stock (the handle for dies). The tap cuts the inside thread in a hole; the die cuts the outside thread on a rod or bolt.
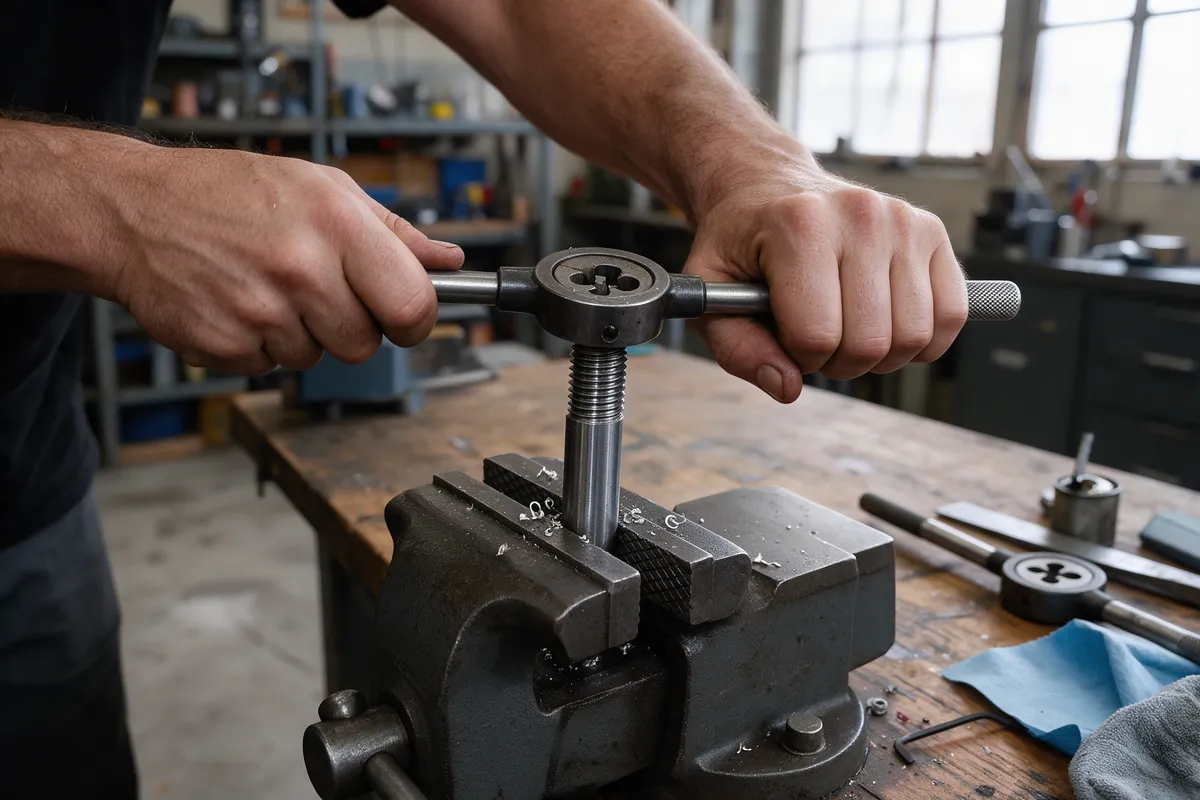
To cut a thread with a die, start with rod at the screw's nominal diameter (1/4 in rod for 1/4-20) and file or grind a chamfer on the end. Put the die in the stock with its tapered lead side facing the work, hold it square to the rod, and turn with the same rhythm as a tap: forward, back to break the chip, with cutting fluid. Many dies can be adjusted slightly: if the nut is too tight, open the die a little and run it over the thread again. Dies are also handy for cleaning up a damaged bolt thread.
Not sure what thread a part has before you buy a tap? See how to identify a thread and screw sizes explained. If a hole is already stripped, fixing a stripped screw hole covers the options.